With the rise of smart homes, traditional electric floor heating systems are gradually being upgraded. Users now want not only manual control of the thermostat but also integration with smart home systems for remote control, scheduling, and automated scene management. This article explains how to connect an electric floor heating thermostat to a smart home system, including practical steps and precautions, helping users achieve a seamless smart upgrade.
Choose a Thermostat with Smart Features
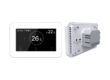
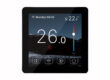
To integrate with a smart home system, the thermostat must support network or smart control. Common types include:
Wi-Fi Thermostats: Connect directly to the home router, controllable via mobile apps from anywhere
Zigbee or Z-Wave Thermostats: Connect through a smart home gateway, supporting automated scene linking
Bluetooth Thermostats: Suitable for single-room control, but limited in remote access
Selecting a thermostat compatible with your smart protocol is the first step for a successful connection.
Ensure a Stable Home Network
Whether Wi-Fi or Zigbee/Z-Wave, thermostats rely on a stable network for data transmission. Before connection, check:
Router coverage and signal strength at the thermostat location
Router supports the required protocol (2.4GHz Wi-Fi or Zigbee/Z-Wave gateway)
Sufficient network bandwidth for smooth remote operation
Network stability directly affects thermostat responsiveness and automation reliability.
Installation and Wiring Considerations
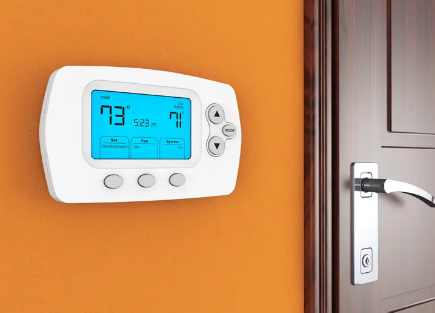
Thermostats should be installed away from high-temperature pipes, direct sunlight, or damp areas, while remaining easily accessible for manual adjustments. Wiring precautions include:
Confirm correct connection of power lines and floor heating circuits to avoid short circuits or leakage
Connect external sensors according to the manufacturer’s instructions, if available
Ensure power is turned off during installation to maintain safety
After installation, test the thermostat manually to verify proper floor heating operation.
Integrating with a Smart Home System
1. Pair the Thermostat with the Gateway or App
Wi-Fi Thermostats: Use the manufacturer’s app to complete Wi-Fi setup and add the thermostat to your account
Zigbee/Z-Wave Thermostats: Scan and pair the device via a smart home gateway or control hub
Once paired, users can monitor real-time temperature, set target temperatures, and schedule heating.
2. Set Up Automated Scenes
Integration enables smart scenarios, such as:
Automatically lowering floor heating when doors or windows are opened to save energy
Preheating rooms in the morning or before returning home for comfort
Linking with humidity sensors to optimize heating performance
Smart scenes enhance convenience and energy efficiency.
3. Manage Access and Remote Control
Users can set permissions through the app, sharing control with family members or granting temporary remote access. Remote temperature adjustments allow control from any location.
Common Issues and Solutions
Thermostat Cannot Connect: Check Wi-Fi signal strength, ensure the password is correct, and confirm the router operates on the 2.4GHz band
Automated Scenes Not Triggering: Ensure the thermostat and gateway are on the same network and verify scene trigger conditions
Lag or Disconnection: Check network stability, and if needed, restart the router or thermostat
Conclusion
Connecting an electric floor heating thermostat to a smart home system enables remote control, scheduling, and scene automation, greatly enhancing convenience and energy efficiency. Key steps include selecting a compatible thermostat, ensuring network stability, proper installation and wiring, pairing with the smart system, and configuring scenes. Following these steps allows users to enjoy the comfort and convenience of a fully smartized floor heating system.